Topic Not Found
We could't find the topic you requested, please selected a topic from the menu.
Product Guide
Learn all about ScratchGraph's features and how to build your knowledge graph with this guide.
Select a topic from the menu.
Creating a sheet
A sheet is a space to place and organize related notes. For example, you can create a sheet for a specific project you're working on or for a certain class.
To create a sheet, click the + button in the tab bar
In the modal that appears, enter a name for the new sheet, and click the Add Sheet button
Renaming a sheet
To rename a sheet:
Open the dropdown menu for the sheet
Click the Tag / Rename option
In the modal that appears, enter the new name for the sheet, and click the Rename button
Adding tags
Once you have more than a handful of sheets, it can be helpful to start tagging them so that related sheets are can be referenced and accessed as a group.
To add tags to a sheet:
Open the dropdown menu for the sheet
Click the Tab / Rename option
In the modal that's displayed, enter one or more tags for the sheet (separate multiple tags with commas), and click Add Tags
Newly created tags will be surfaced in the main menu. Clicking on a tag in the main menu will update the tab bar to only show sheets with that tag.
Creating a note
A note simply holds some bit of content. That content can be whatever you want: a description of something, a random idea you need to jot down, links to other content on the web, and/or an image illustrating a concept.
To create a note:
Click or tap (if you're on a touch device) the Create button on the bottom-left of the screen
Click an empty area of the sheet to create the note at that location
Alternatively, you can double-click (or double-tap) an empty area of the sheet to quickly create a note at that position.
Formatting text
Formatting text within a note allows you to style, align, and structure a note's content to better communicate a concept or idea.
Text within a note can be formatted by selecting the text, which will bring up the formatting toolbar. From the toolbar, you can adjust styling (bold, italic, underline, etc.), alignment (left, center, right), and structuring (checklist, bulleted list) options.
Creating links
There's a world of knowledge and content on the web, you can create links within notes to reference external web content. In addition, you can create links to your other content within ScratchGraph by creating links to other sheets.
To add a link:
Bring up the formatting toolbar by selecting the text you'd like to turn into a link
Click on the Link button
In the popup that appears, paste the URL of a web page and click the Create Link button
Changing a note's color
By default, notes are automatically colored, meaning they are black when isolated and, when placed in a cluster, take on the color of the cluster.
However, you can change to a fixed, custom color via the Note's settings menu.
Changing a note's shape
By default, notes are rectangular, but can be changed to a capsule shape to provide contrast against other notes on a sheet.
To change the shape of a note:
Click on the gear icon within a note to bring up the note settings menu
Click on the Shape tab
Select the desired shape from the menu
Inserting images and videos
Images and videos are powerful visual tools to help communicate concepts and ideas, or to highlight a topic with iconography.
To insert an image of video into a note:
On a blank line within a note, click the Insert Image button
Click Browse to select an image (JPEG or PNG) or video (MP4)
Click the Upload & Attach button to upload your content and insert it into the note
Deleting a note
To delete a note:
Click on the gear icon to open the note's settings menu
Select the Delete tab
Click the Delete Note button
Alternatively, you can drag and select one or more notes, then press Shift + Delete to quickly delete all of them.
Grouping notes into clusters
Notes moved and placed next to each other will create and/or be added to a cluster.
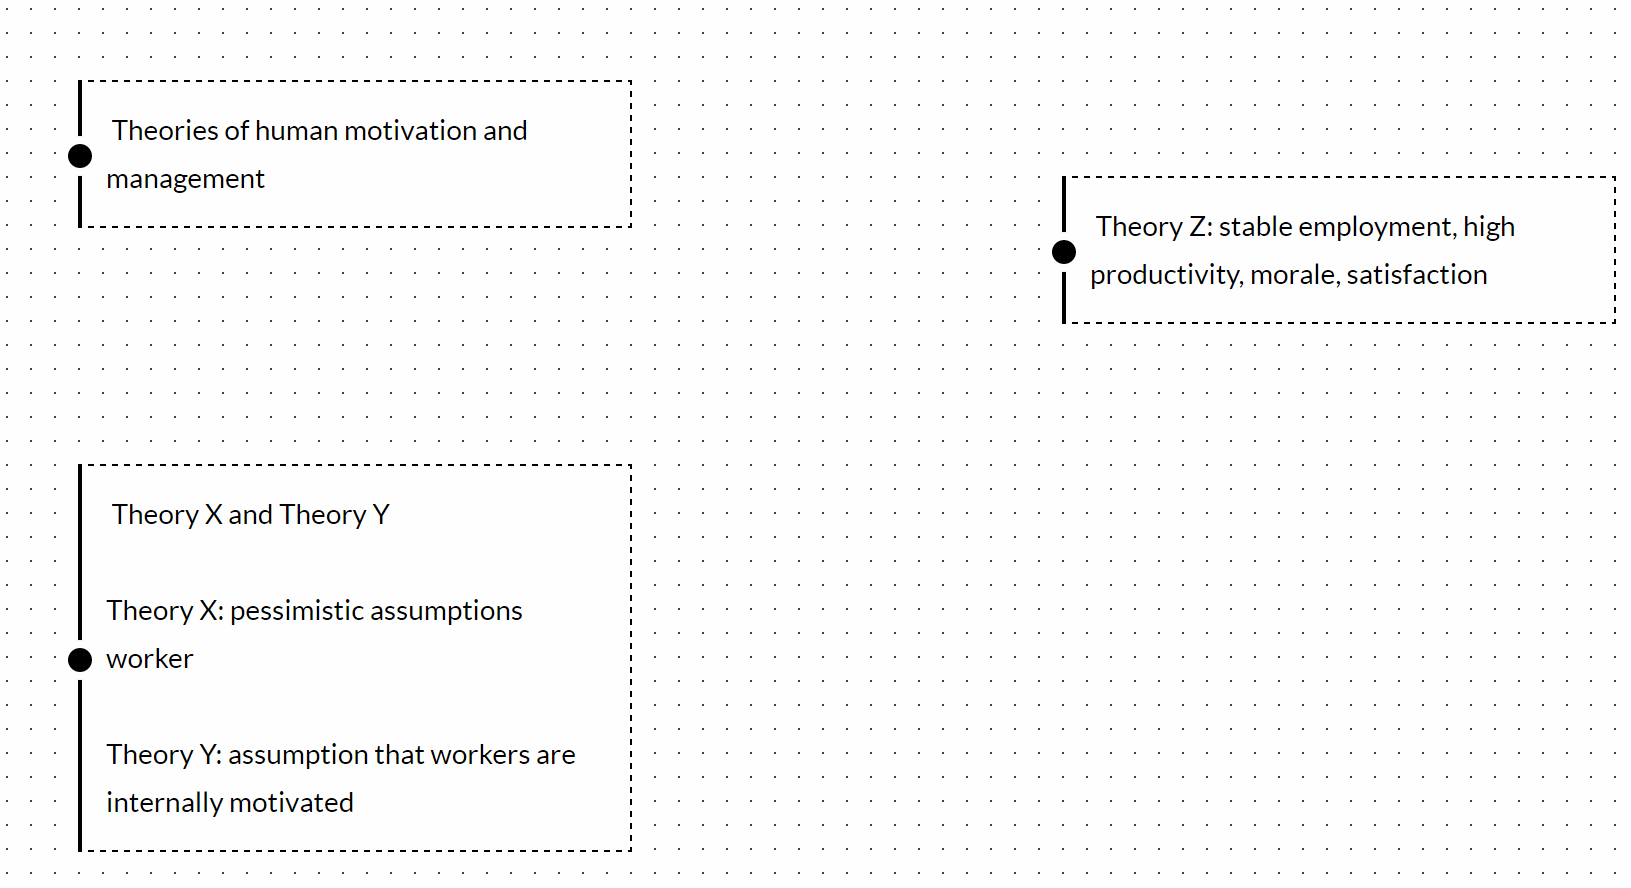
Newly created clusters will automatically assume a random color and any new notes added to that cluster will take on that color.
Connecting notes
A connector between 2+ notes serves to show that there is some sort of relationship or information flow between the connected notes.
To connect one note to another:
Click the connector button on a selected note
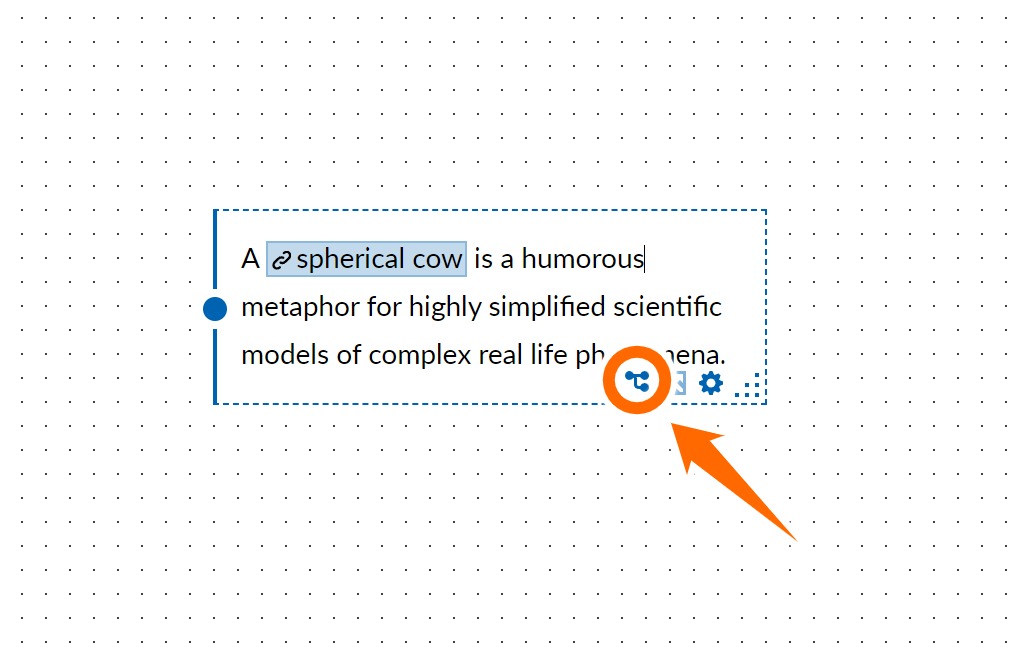
Click on another note you'd like to connect it to
Connectors are dynamic; they will automatically adjust when notes are moved or resized.
Click on the connector itself to adjust the style, add a label, or remove it.
Changing a connector's style
The style of a connector can help to further communicate the relationship between 2 notes.
To change the style of a connector:
Click on the connector
Select the the Style tab (it should be selected by default)
Select the style you'd like for the connector
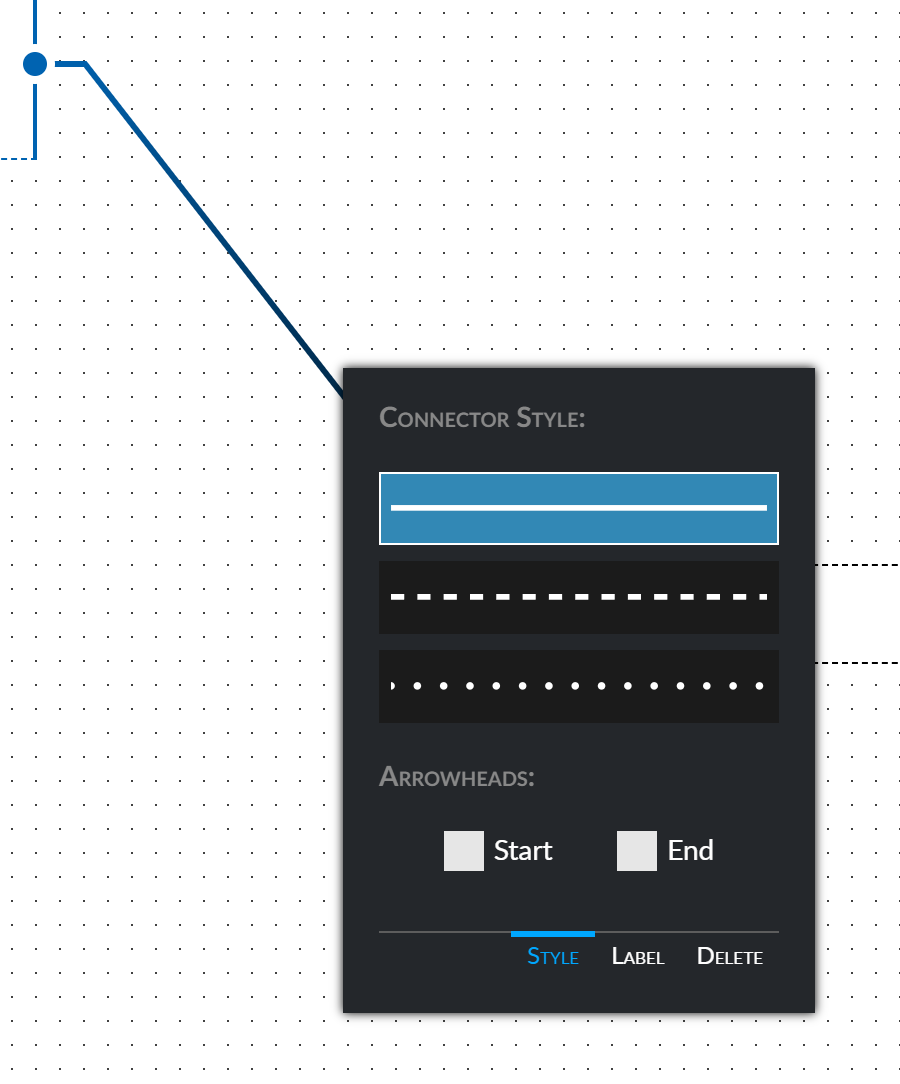
Adding a label to a connector
A label on a connector can help to describe the relationship between 2 notes.
To add or change the label on a connector:
Click on the connector
Select the the Label tab
Enter the text for the label and click Update Label
Deleting a connector
To delete a connector:
Click on the connector
Select the the Delete tab
Click the Delete Connector button
Sharing a sheet publicly
Enabling link sharing will allow anyone with a link to the sheet the ability to view and export the sheet.
To enable link sharing:
Open the dropdown menu for the sheet
Select the Share option
In the modal that appears, click the Enable Link Sharing button
Adding collaborators to a sheet
Collaborators can view and edit the content on a sheet, allowing teammates to work together on a project.
To add a collaborator:
Open the dropdown menu for the sheet
Select the Share option
In the modal that appears, enter the email address of the collaborator, and click the Add Collaborator button
Search
ScratchGraph's search functionality allows you to search for content across all your notes and sheets.
To perform a search:
Open the main menu
Click the Search option
Enter your search query in panel that appears and press Enter
Updating your name and email address
To update your name and/or email address:
Open the account menu
Select the Settings option
Select the Profile tab
Enter your name and/or email address and click the Update Profile button